
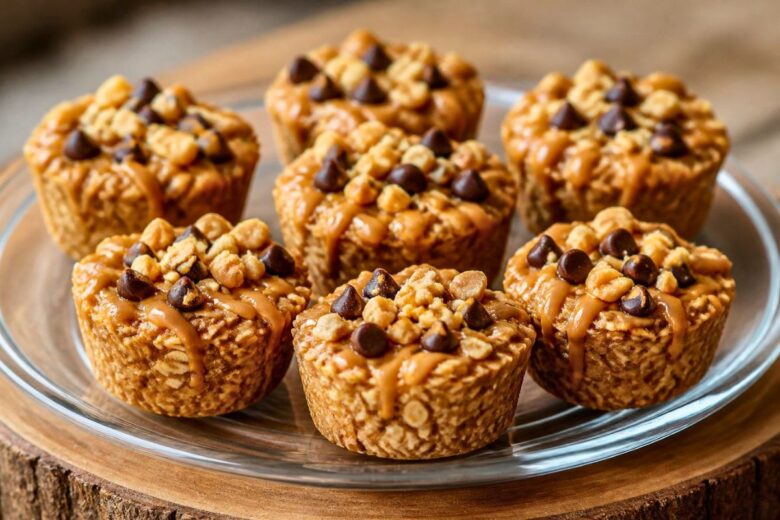
No-Bake Peanut Butter Oat Cups Recipe is one of the easiest treats you can make at home. It needs simple pantry ingredients and no oven. This No-Bake Peanut Butter Oat Cups Recipe is creamy, chewy and full of peanut butter flavor.
If you want to learn How to make No-Bake Peanut Butter Oat Cups, this guide has everything you need. The Ingredients for No-Bake Peanut Butter Oat Cups are affordable, and the recipe is perfect for busy days.
My Story With This Comforting No-Bake Peanut Butter Oat Cups
I first made these oat cups on a warm summer afternoon. It was too hot to turn on the oven. I wanted a sweet snack that was quick and simple.
I mixed everything in one bowl and placed the cups in the refrigerator. My family loved them after the first bite. They asked me to make another batch the next day.
Now, these oat cups are always in my fridge. They are perfect for snacks, lunch boxes, or a quick dessert after dinner.
Equipment List
- Mixing bowl
- Measuring cups
- Measuring spoons
- Rubber spatula
- Microwave-safe bowl
- Muffin pan
- Paper cupcake liners
- Spoon
- Refrigerator
Recipe Overview
- Recipe Name: No-Bake Peanut Butter Oat Cups Recipe
- Servings: 12 cups
- Prep Time: 15 minutes
- Cook Time: 0 minutes
- Total Time: 1 hour 15 minutes (including chilling)
- Course: Dessert
- Cuisine: American
- Calories: 220 kcal per serving
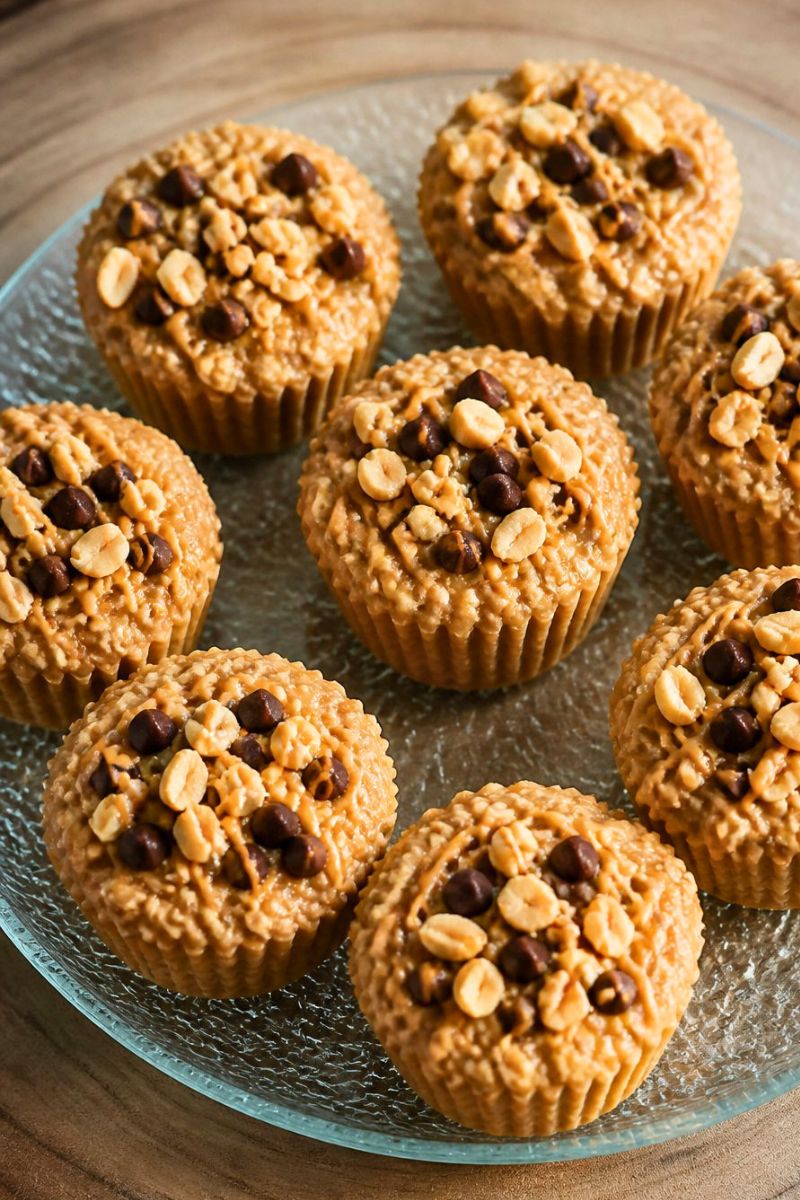
Ingredients for No-Bake Peanut Butter Oat Cups
- 2 cups old-fashioned rolled oats
- 1 cup creamy peanut butter
- ¼ cup honey
- 2 tablespoons maple syrup
- 2 tablespoons melted coconut oil
- 1 teaspoon vanilla extract
- ¼ teaspoon salt
- ¼ cup mini chocolate chips
- 2 tablespoons chopped peanuts (optional)
Instruction for No-Bake Peanut Butter Oat Cups
1. Prepare the Muffin Pan
Line a muffin pan with paper liners. This makes removing the oat cups very easy. Set the prepared pan aside while you mix the filling. It saves time later and keeps everything neat.
2. Mix the Wet Ingredients
Add peanut butter, honey, maple syrup, coconut oil, vanilla, and salt to a microwave-safe bowl. Heat for about 20 seconds if needed. Stir until the mixture becomes smooth, creamy, and fully combined.
3. Add the Oats
Pour the rolled oats into the peanut butter mixture. Stir slowly until every oat is coated well. Fold gently to keep the texture even. The mixture should be thick and easy to scoop.
4. Add the Chocolate Chips
Let the mixture cool slightly before adding the chocolate chips. This keeps them from melting. Fold them in gently so every bite has a little chocolate flavor.
5. Fill the Muffin Cups
Spoon the oat mixture evenly into each paper liner. Press the tops gently with the back of a spoon. Sprinkle chopped peanuts over each cup if you like extra crunch.
6. Chill Until Firm
Place the muffin pan in the refrigerator for at least one hour. The oat cups will become firm and easy to remove. Chilling also helps all the flavors blend together beautifully.
7. Serve and Enjoy
Remove the oat cups from the liners before serving. Enjoy them cold for the best texture. Store the extras in the refrigerator for a quick snack whenever you need something sweet.
Cooking Tips and Simple Recipe Variations
- Use natural peanut butter for a richer flavor.
- Stir the peanut butter well before measuring.
- Add shredded coconut for extra texture.
- Mix in chia seeds for more fiber.
- Use almond butter instead of peanut butter.
- Add raisins or dried cranberries.
- Sprinkle flaky sea salt on top.
- Drizzle melted dark chocolate over each cup.
- Add cinnamon for warm flavor.
- Keep the cups chilled before serving.
Little History Behind This Comfort Food
No-bake desserts became popular because they are fast and easy. Families wanted sweet treats without using the oven. Peanut butter and oats became a favorite combination because they are filling, affordable and delicious.
Today, no-bake oat cups are enjoyed around the world as snacks, desserts and quick breakfast bites. Their simple ingredients make them perfect for busy home cooks.
What to Serve With This Dish
- Fresh strawberries
- Banana slices
- Greek yogurt
- Cold milk
- Hot coffee
- Herbal tea
- Fresh blueberries
- Apple slices
- Smoothies
- Vanilla yogurt
Occasion or Event Ideas
These oat cups are perfect for school lunch boxes, family picnics, birthday parties, afternoon snacks, road trips, holiday dessert trays, meal prep days and weekend gatherings.
They also make a thoughtful homemade gift when packed in a small decorative box.
Storage and Reheating Tips
- Store in an airtight container.
- Refrigerate for up to 7 days.
- Freeze for up to 2 months.
- Separate layers with parchment paper.
- Thaw for 15 minutes before eating.
- No reheating is needed.
- Keep chilled for the best texture.
Nutrition Information
| Nutrient | Amount Per Serving |
|---|---|
| Calories | 220 kcal |
| Protein | 7 g |
| Carbohydrates | 20 g |
| Fat | 14 g |
| Saturated Fat | 4 g |
| Fiber | 3 g |
| Sugar | 9 g |
| Sodium | 110 mg |
Is This Dish Good for You?
Yes, these oat cups can be a healthier dessert when enjoyed in moderation. Oats provide fiber that helps you feel full. Peanut butter adds protein and healthy fats.
Honey gives natural sweetness, while homemade ingredients let you control the sugar. Pair one oat cup with fresh fruit for a balanced snack.
No-Bake Peanut Butter Oat Cups Recipe

Ingredients
- 2 cups old-fashioned rolled oats
- 1 cup creamy peanut butter
- ¼ cup honey
- 2 tablespoons maple syrup
- 2 tablespoons melted coconut oil
- 1 teaspoon vanilla extract
- ¼ teaspoon salt
- ¼ cup mini chocolate chips
- 2 tablespoons chopped peanuts optional
Instructions
Prepare the Muffin Pan
- Line a muffin pan with paper liners. This makes removing the oat cups very easy. Set the prepared pan aside while you mix the filling. It saves time later and keeps everything neat.
Mix the Wet Ingredients
- Add peanut butter, honey, maple syrup, coconut oil, vanilla, and salt to a microwave-safe bowl. Heat for about 20 seconds if needed. Stir until the mixture becomes smooth, creamy, and fully combined.
Add the Oats
- Pour the rolled oats into the peanut butter mixture. Stir slowly until every oat is coated well. Fold gently to keep the texture even. The mixture should be thick and easy to scoop.
Add the Chocolate Chips
- Let the mixture cool slightly before adding the chocolate chips. This keeps them from melting. Fold them in gently so every bite has a little chocolate flavor.
Fill the Muffin Cups
- Spoon the oat mixture evenly into each paper liner. Press the tops gently with the back of a spoon. Sprinkle chopped peanuts over each cup if you like extra crunch.
Chill Until Firm
- Place the muffin pan in the refrigerator for at least one hour. The oat cups will become firm and easy to remove. Chilling also helps all the flavors blend together beautifully.
Serve and Enjoy
- Remove the oat cups from the liners before serving. Enjoy them cold for the best texture. Store the extras in the refrigerator for a quick snack whenever you need something sweet.
Notes
- Use natural peanut butter for a richer flavor.
- Stir the peanut butter well before measuring.
- Add shredded coconut for extra texture.
- Mix in chia seeds for more fiber.
- Use almond butter instead of peanut butter.
- Add raisins or dried cranberries.
- Sprinkle flaky sea salt on top.
- Drizzle melted dark chocolate over each cup.
- Add cinnamon for warm flavor.
- Keep the cups chilled before serving.
FAQs about No-Bake Peanut Butter Oat Cups Recipe
Can I use quick oats instead of rolled oats?
Yes, quick oats work well in this recipe. They create a softer texture than rolled oats. If you enjoy a little chewiness, rolled oats remain the better choice for these delicious no-bake cups.
Can I freeze No-Bake Peanut Butter Oat Cups?
Yes. Place the oat cups in a freezer-safe container with parchment paper between the layers. Freeze them for up to two months. Let them sit at room temperature for several minutes before enjoying.
Can I make this recipe without honey?
Absolutely. Replace the honey with extra maple syrup or your favorite liquid sweetener. The texture may become slightly softer, but the oat cups will still hold together after chilling well.
Are these oat cups good for meal prep?
Yes, they are perfect for meal prep. Make one batch on the weekend and enjoy quick snacks throughout the week. They stay fresh in the refrigerator and are easy to pack for work or school.
Can I add extra mix-ins?
Yes. Chopped nuts, dried fruit, mini chocolate chips, pumpkin seeds, or sunflower seeds all taste wonderful. Mix them into the oat mixture before filling the muffin liners for extra flavor and texture.
Final Thoughts
This No-Bake Peanut Butter Oat Cups Recipe is simple, delicious, and perfect for every skill level. The recipe uses everyday ingredients and takes very little effort. Now you know How to make No-Bake Peanut Butter Oat Cups with easy, step-by-step instructions.
Gather the Ingredients for No-Bake Peanut Butter Oat Cups, make a batch today, and enjoy a homemade treat that everyone will love. These creamy oat cups are great for snacks, desserts or sharing with family and friends. They are sure to become one of your favorite no-bake recipes.
Hi! I’m Livy Lane, the creator of LivyCooks.com. I share easy, delicious recipes anyone can make at home. Let’s cook, taste and enjoy every bite together!