This Gluten-Free Graham Cracker Crust Recipe is simple and delicious. It works for many desserts like pies and cheesecakes. If you are looking for a Gluten-Free Graham Cracker Crust Recipe that is easy and reliable, this one is perfect.
You only need a few ingredients and basic tools. Learning how to make Gluten-Free Graham Cracker Crust at home saves money and gives better taste. This crust is crunchy, buttery and holds fillings very well.
My Story With This Comforting Dish
I first tried a gluten-free crust when a friend visited my home. She could not eat regular graham crackers. I wanted her to enjoy dessert without worry. So I tested a Gluten-Free Graham Cracker Crust Recipe in my kitchen.
The first try was too soft. The second try was perfect. Now it is my go-to base for many desserts. I love how simple ingredients create something so tasty and comforting — much like the feeling you get when making a rich, no-fuss pie filling from scratch on a relaxed weekend afternoon.
Equipment List
- Mixing bowl
- Measuring cups
- Measuring spoons
- Food processor or rolling pin
- Pie pan or springform pan
- Spatula
- Oven
Recipe Overview
- Recipe Name: Gluten-Free Graham Cracker Crust Recipe
- Servings: 8
- Prep Time: 10 minutes
- Cook Time: 10 minutes
- Total Time: 20 minutes
- Course: Dessert base
- Cuisine: American
- Calories: 180 kcal per serving
Ingredients for Gluten-Free Graham Cracker Crust (with Quantity)
- 1 ½ cups gluten-free graham cracker crumbs
- 6 tablespoons melted unsalted butter
- 2 tablespoons sugar
- 1 teaspoon cinnamon (optional)
- Pinch of salt
Instructions for Gluten-Free Graham Cracker Crust Recipe
1. Prepare the Crumbs
Take gluten-free graham crackers and crush them into fine crumbs. You can use a food processor or a rolling pin. Make sure the texture is even and sandy for a perfect crust base.
2. Mix Dry Ingredients
In a large bowl, add crumbs, sugar, cinnamon and salt. Mix well using a spoon. This helps spread flavors evenly throughout the Gluten-Free Graham Cracker Crust Recipe before adding butter.
3. Add Melted Butter
Pour melted butter slowly into the crumb mixture. Stir gently until everything looks moist and combined. The mixture should feel like wet sand and hold together when pressed in your hand.
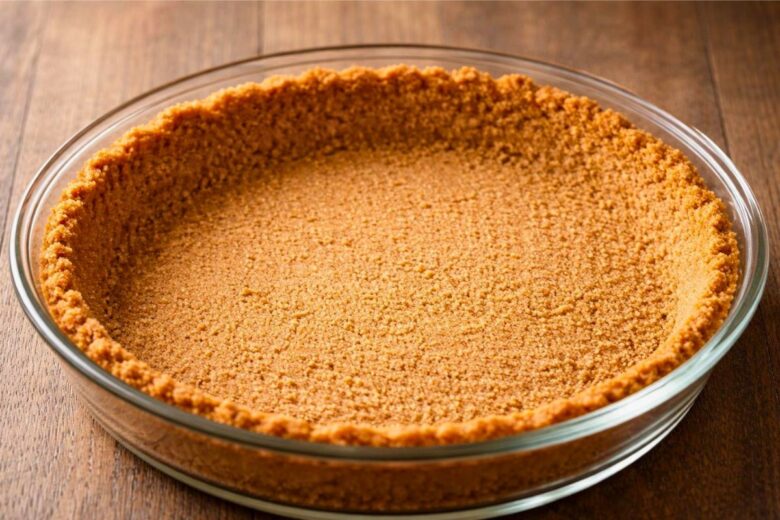
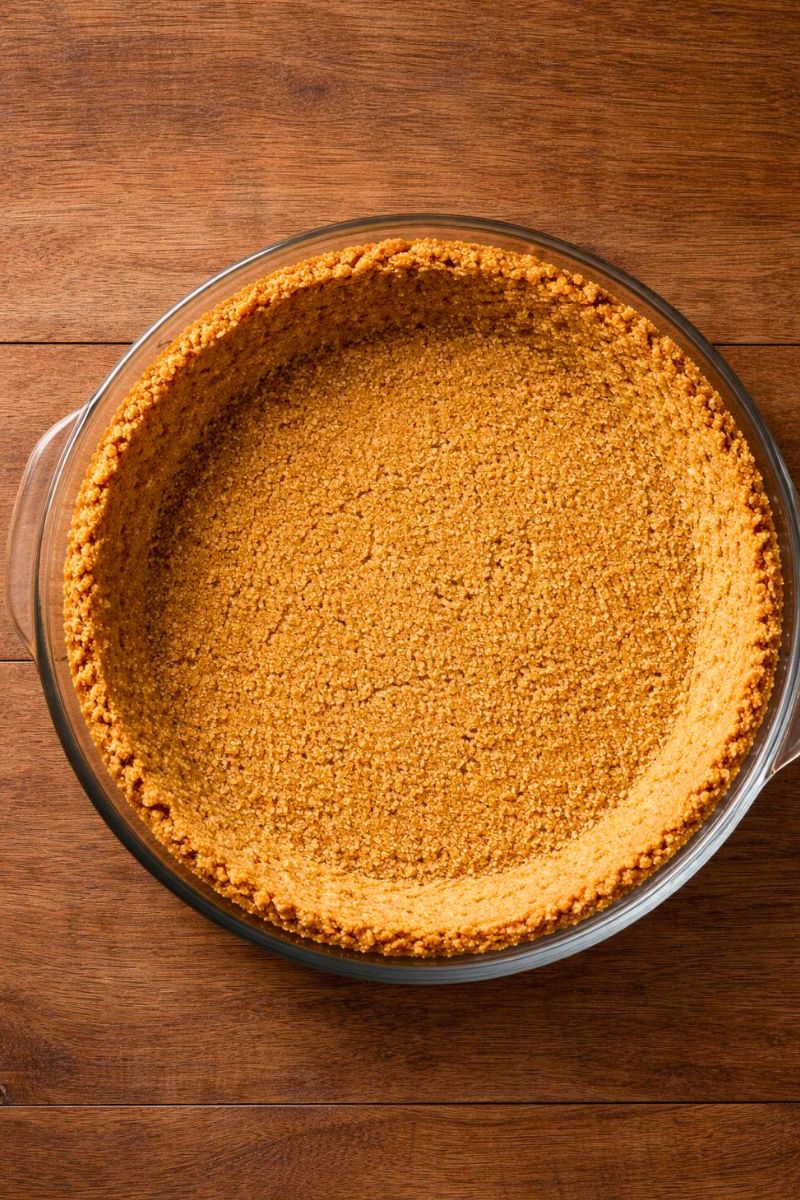
4. Press into Pan
Transfer the mixture into a pie pan. Press it firmly using a spoon or your fingers. Make sure the bottom and sides are evenly covered for a strong crust base.
5. Bake the Crust
Preheat oven to 350°F (175°C). Bake the crust for 8–10 minutes. This step helps it set and become slightly golden, giving a crispy and stable texture for fillings.
6. Cool Before Filling
Remove from oven and let it cool completely. Cooling helps the crust firm up. Now it is ready for cheesecake, pudding or any dessert filling you love. If you enjoy creamy pie-style desserts, try pairing this crust with a silky peanut butter filling that sets beautifully with no fuss.
Cooking Tips and Simple Recipe Variations
- Use dairy-free butter for a vegan version
- Add cocoa powder for a chocolate crust
- Press firmly to avoid crumbling
- Chill instead of baking for no-bake desserts
- Add nut crumbs for extra crunch
For those who prefer plant-based baking, this crust pairs wonderfully with a dairy-free pudding made with chia seeds and blueberries — a light, wholesome filling that complements the buttery base perfectly.
A Little History Behind This Comfort Food
Graham cracker crust became popular in American kitchens in the early 1900s. People loved its simple ingredients and sweet taste. Over time, it became a classic base for cheesecakes and pies.
The gluten-free version is modern and helps people with dietary needs enjoy the same comfort desserts without gluten problems.
What to Serve With This Dish
This crust works well with many fillings. You can use cheesecake, lemon pie, chocolate mousse or fruit fillings. It also pairs nicely with whipped cream and fresh berries.
The crust is neutral but slightly sweet, making it perfect for both rich and light desserts. For something a little more indulgent, consider topping it with a scoop of homemade vanilla custard ice cream — the contrast of cold creaminess against the crunchy base is absolutely wonderful.
If you love the combination of sweet and tangy, this crust also makes a great base for a layered strawberry and pretzel-inspired dessert that is always a crowd pleaser at gatherings.
Occasion or Event Ideas
- Birthday parties
- Holiday dinners
- Family gatherings
- Summer BBQ desserts
- Weekend baking fun
Storage and Reheating Tips
- Store baked crust at room temperature for 2 days
- Refrigerate for up to 5 days
- Freeze for up to 2 months
- Wrap tightly in plastic wrap
- Reheat in oven for 5 minutes if needed
Nutrition Information
| Nutrient | Amount per serving |
|---|---|
| Calories | 180 kcal |
| Fat | 10g |
| Carbohydrates | 20g |
| Sugar | 8g |
| Protein | 2g |
| Fiber | 1g |
Is This Dish Good for You?
Yes, this Gluten-Free Graham Cracker Crust Recipe is a better option for people avoiding gluten. It is lighter than many store-bought crusts. You can also adjust sugar and butter to make it healthier. It gives energy but should be eaten in moderation as part of a balanced dessert.

Gluten-Free Graham Cracker Crust Recipe
Ingredients
- 1 ½ cups gluten-free graham cracker crumbs
- 6 tablespoons melted unsalted butter
- 2 tablespoons sugar
- 1 teaspoon cinnamon optional
- Pinch of salt
Instructions
Prepare the Crumbs
- Take gluten-free graham crackers and crush them into fine crumbs. You can use a food processor or a rolling pin. Make sure the texture is even and sandy for a perfect crust base.
Mix Dry Ingredients
- In a large bowl, add crumbs, sugar, cinnamon and salt. Mix well using a spoon. This helps spread flavors evenly throughout the Gluten-Free Graham Cracker Crust Recipe before adding butter.
Add Melted Butter
- Pour melted butter slowly into the crumb mixture. Stir gently until everything looks moist and combined. The mixture should feel like wet sand and hold together when pressed in your hand.
Press into Pan
- Transfer the mixture into a pie pan. Press it firmly using a spoon or your fingers. Make sure the bottom and sides are evenly covered for a strong crust base.
Bake the Crust
- Preheat oven to 350°F (175°C). Bake the crust for 8–10 minutes. This step helps it set and become slightly golden, giving a crispy and stable texture for fillings.
Cool Before Filling
- Remove from oven and let it cool completely. Cooling helps the crust firm up. Now it is ready for cheesecake, pudding or any dessert filling you love. If you enjoy creamy pie-style desserts, try pairing this crust with a silky peanut butter filling that sets beautifully with no fuss.
Notes
- Use dairy-free butter for a vegan version
- Add cocoa powder for a chocolate crust
- Press firmly to avoid crumbling
- Chill instead of baking for no-bake desserts
- Add nut crumbs for extra crunch
FAQs about Gluten-Free Graham Cracker Crust Recipe
1. Can I make this crust without baking?
Yes, you can skip baking. Just chill the crust in the fridge for at least one hour. It will still hold together well for no-bake desserts like cheesecake or pudding pies.
A no-bake approach also works beautifully if you plan to fill it with something like a rich, creamy chocolate mousse or cobbler-style topping that needs no extra heat.
2. What can I use instead of graham crackers?
You can use gluten-free digestive biscuits or almond flour cookies. Both options work well. They give a slightly different flavor but still create a strong and tasty crust base.
3. Why is my crust falling apart?
This usually happens when there is not enough butter. Make sure the mixture feels like wet sand. Also, press it firmly into the pan before baking or chilling.
4. Can I make this crust dairy-free?
Yes, you can replace butter with coconut oil or dairy-free margarine. The texture stays similar and the crust still tastes delicious and holds together well.
5. How thick should the crust be?
The crust should be about ¼ inch thick on the bottom and sides. Too thick makes it heavy, and too thin may break when adding filling.
Final Thoughts
This Gluten-Free Graham Cracker Crust Recipe is simple, reliable and very versatile. It fits many desserts and occasions. Once you learn how to make Gluten-Free Graham Cracker Crust at home, you will prefer it over store-bought versions. The taste is fresh, buttery and perfectly sweet. I hope you enjoy making it as much as I do in my kitchen.

Hi! I’m Livy Lane, the creator of LivyCooks.com. I share easy, delicious recipes anyone can make at home. Let’s cook, taste and enjoy every bite together!