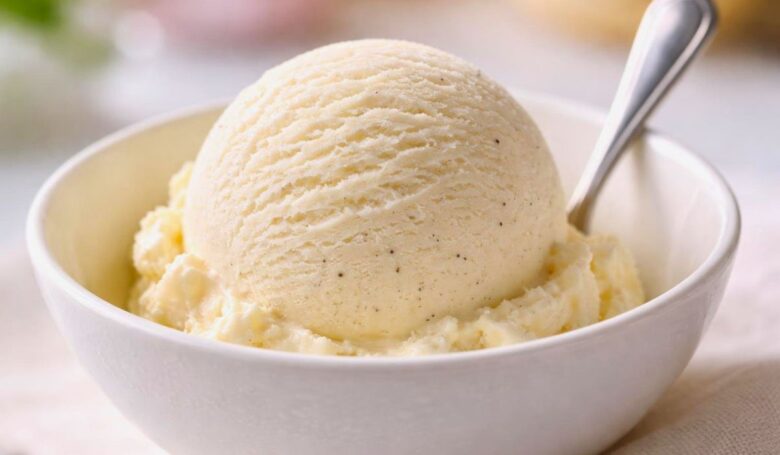
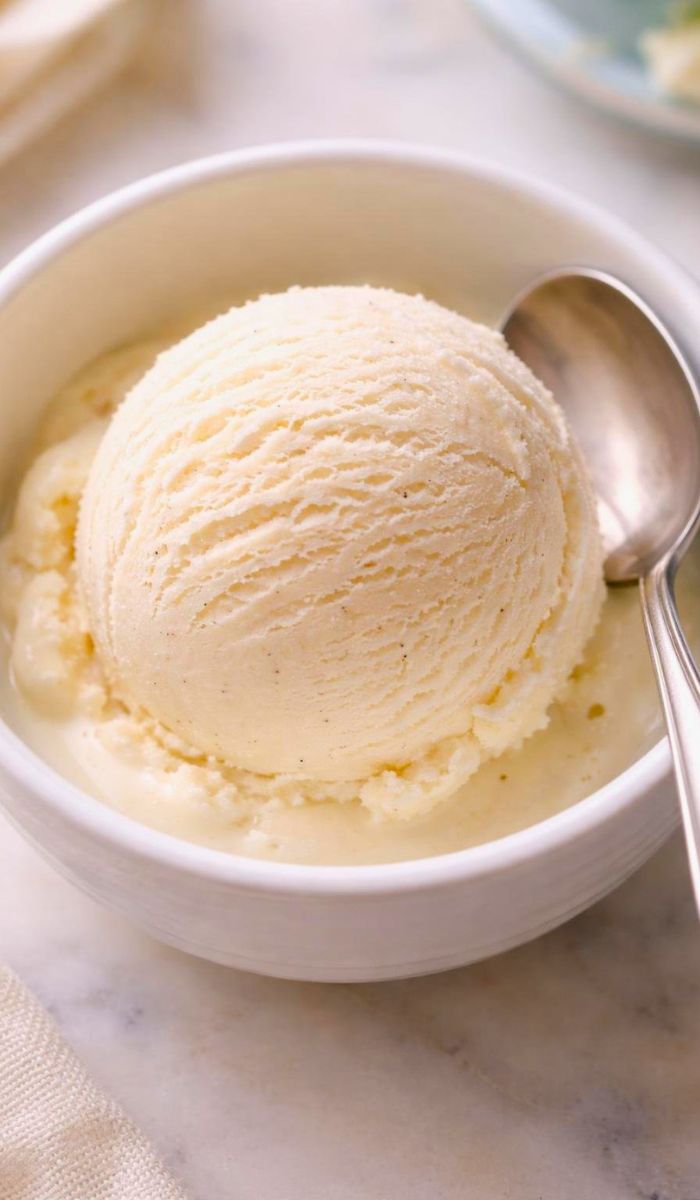
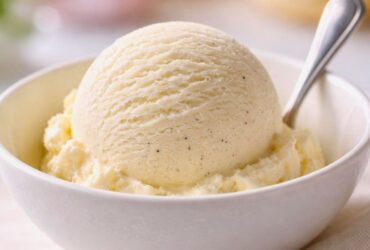
If you want the creamiest treat ever this Ninja Creami Vanilla Ice Cream Recipe is for you. It is a simple and classic dessert that tastes better than any store-bought brand.
Making this Ninja Creami Vanilla Ice Cream Recipe at home is very fast and incredibly fun. You only need a few basic pantry ingredients to get started. This recipe is the perfect base for all your favorite toppings and mix-ins.
Once you learn how to make Ninja Creami Vanilla Ice Cream, you will never go back.
My Story With This Comforting Vanilla Ice Cream
I remember the day I finally brought my Ninja Creami home. I was so excited to try making a healthy homemade version of my favorite dessert. Vanilla has always been my top choice because it is so clean and sweet.
It reminds me of summer vacations and trips to the local dairy farm.The first time I spun a pint, I could not believe the texture. It was so thick and smooth, just like professional gelato.
My kids gathered around the kitchen counter waiting for their very first taste. We ended up eating the whole pint right out of the container with silver spoons.
Now, I always keep a few pints of this vanilla base in my freezer. It is my secret weapon for whenever a sweet craving hits the family.
Equipment List
- Ninja Creami Machine (any model works)
- Ninja Creami Pint container with lid
- A small mixing bowl
- A whisk or a handheld frother
- Measuring cups and spoons
Recipe Overview
- Recipe Name: Ninja Creami Vanilla Ice Cream
- Servings: 2 people
- Prep Time: 5 mins
- Freeze Time: 24 hours
- Total Time: 24 hours 5 mins
- Course: Dessert
- Cuisine: American
- Calories: 280 kcal per serving
Ingredients for Ninja Creami Vanilla Ice Cream Recipe
- 1 cup whole milk
- 1/2 cup heavy cream
- 1/4 cup granulated sugar
- 1 tablespoon cream cheese (softened)
- 1 teaspoon pure vanilla extract
- A tiny pinch of sea salt
Instruction for Ninja Creami Vanilla Ice Cream Recipe
1. Soften the Cream Cheese
Place your cream cheese in a small microwave-safe bowl. Heat it for 10 seconds until it is very soft and easy to stir.
2. Mix Sugar and Cream Cheese
Add the sugar and vanilla extract to the softened cream cheese. Whisk them together until the mixture looks like a smooth, thick paste.
3. Add the Liquid Ingredients
Slowly pour the whole milk and heavy cream into the bowl. Whisk gently until all the sugar has completely dissolved into the liquid.
4. Fill the Pint Container
Pour your vanilla mixture into the clean Ninja Creami pint. Make sure you do not go past the maximum fill line.
5. Freeze the Base
Place the lid on the pint and set it on a level surface in your freezer. Let it freeze for a full 24 hours.
6. Prepare to Spin
Take the pint out of the freezer and remove the lid. Place the pint into the outer bowl of your Ninja Creami machine.
7. Select the Program
Lock the bowl into the machine and select the “Ice Cream” button. The machine will spin for about two minutes to create a creamy texture.
8. Check the Texture
If the ice cream looks a bit powdery, do not worry. Simply add one tablespoon of milk and press the “Re-spin” button.
9. Add Your Mix-ins
If you want chocolate chips or cookies, make a hole in the center. Add your treats and press the “Mix-in” button.
10. Serve and Enjoy
Scoop the fresh ice cream into chilled bowls or eat it straight. Serve it immediately while the texture is soft and perfect.
Cooking Tips and Simple Recipe Variations
- Use a frother to get a very smooth mix without any lumps.
- Make sure your freezer is set to a very cold temperature.
- Swap the sugar for maple syrup if you want a deeper flavor.
- Add a splash of almond extract for a “wedding cake” taste.
- Use dairy-free cream and coconut milk for a vegan version.
- Mix in some crushed sprinkles at the end for a party vibe.
Little History Behind This Comfort Food
Ice cream has been a favorite treat for hundreds of years. Early versions were made using ice and salt to freeze the cream. The Ninja Creami changed the game by using a different technology.
Instead of churning while freezing, it shaves a frozen solid block. This makes the ice cream much smoother than traditional home machines. Vanilla remains the most popular flavor in the world for a reason.
it is simple elegant and goes with everything. This modern machine helps us enjoy that classic taste with much less effort.
What to Serve With This Dish
This vanilla ice cream is the perfect partner for a warm fruit cobbler. It also tastes amazing on top of a hot, fudgy brownie. You can pour a shot of espresso over it for a fancy affogato.
If you want something simple, just add some fresh sliced strawberries. It is also great for making homemade root beer floats in the summer. A drizzle of salted caramel sauce will take it to the next level.
Occasion or Event Ideas
This recipe is a lifesaver for summer birthday parties and backyard get-togethers. You can prep several pints ahead of time and spin them as needed. It is also a wonderful treat for a cozy movie night at home.
Serve it during holiday dinners alongside a slice of warm apple pie. Kids love being part of the “spinning” process and watching the magic happen. It makes any regular Tuesday feel like a special celebration.
Storage and Reheating Tips
- Always smooth the top of the ice cream before re-freezing it.
- Put the lid back on tightly to prevent any freezer burn.
- If it gets too hard, just use the “Re-spin” function again.
- Do not melt and re-freeze the mixture in the pint.
- Store your pints in the coldest part of your freezer.
- Consume the finished ice cream within one week for best flavor.
Nutrition Information
| Nutrient | Amount |
| Calories | 280 kcal |
| Total Fat | 18g |
| Saturated Fat | 11g |
| Carbohydrates | 26g |
| Protein | 4g |
| Calcium | 10% DV |
Is This Dish Good for You?
This homemade vanilla ice cream is a much better choice than store brands. You can see every ingredient that goes into your pint container. It has no weird preservatives or chemical stabilizers like commercial ice cream.
The milk and cream provide a good amount of calcium for your bones. Because it is so rich, a small serving is very satisfying. It is a wonderful way to treat yourself while keeping your food simple.
Just enjoy it in moderation as part of your happy, healthy lifestyle.
Ninja Creami Vanilla Ice Cream Recipe
Ingredients
- 1 cup whole milk
- 1/2 cup heavy cream
- 1/4 cup granulated sugar
- 1 tablespoon cream cheese softened
- 1 teaspoon pure vanilla extract
- A tiny pinch of sea salt
Instructions
Soften the Cream Cheese
- Place your cream cheese in a small microwave-safe bowl. Heat it for 10 seconds until it is very soft and easy to stir.
Mix Sugar and Cream Cheese
- Add the sugar and vanilla extract to the softened cream cheese. Whisk them together until the mixture looks like a smooth, thick paste.
Add the Liquid Ingredients
- Slowly pour the whole milk and heavy cream into the bowl. Whisk gently until all the sugar has completely dissolved into the liquid.
Fill the Pint Container
- Pour your vanilla mixture into the clean Ninja Creami pint. Make sure you do not go past the maximum fill line.
Freeze the Base
- Place the lid on the pint and set it on a level surface in your freezer. Let it freeze for a full 24 hours.
Prepare to Spin
- Take the pint out of the freezer and remove the lid. Place the pint into the outer bowl of your Ninja Creami machine.
Select the Program
- Lock the bowl into the machine and select the “Ice Cream” button. The machine will spin for about two minutes to create a creamy texture.
Check the Texture
- If the ice cream looks a bit powdery, do not worry. Simply add one tablespoon of milk and press the “Re-spin” button.
Add Your Mix-ins
- If you want chocolate chips or cookies, make a hole in the center. Add your treats and press the “Mix-in” button.
Serve and Enjoy
- Scoop the fresh ice cream into chilled bowls or eat it straight. Serve it immediately while the texture is soft and perfect.
Notes
- Use a frother to get a very smooth mix without any lumps.
- Make sure your freezer is set to a very cold temperature.
- Swap the sugar for maple syrup if you want a deeper flavor.
- Add a splash of almond extract for a “wedding cake” taste.
- Use dairy-free cream and coconut milk for a vegan version.
- Mix in some crushed sprinkles at the end for a party vibe.
FAQs about Ninja Creami Vanilla Ice Cream Recipe
Why is my ice cream crumbly after the first spin?
This happens if your freezer is extra cold or the mix is lean. Just add a splash of milk and hit “Re-spin” to fix it.
Can I use low-fat milk for this recipe?
You can, but the ice cream will be less creamy and more icy. Adding a little extra cream cheese can help with the texture.
Do I really have to freeze it for 24 hours?
Yes, the machine needs the base to be completely solid to work. Shaving a soft base can damage the blade or the motor.
What is the purpose of the cream cheese?
The cream cheese acts as a natural stabilizer for the ice cream. it keeps the texture smooth and prevents it from becoming too icy.
Final Thoughts
Making this Ninja Creami Vanilla Ice Cream Recipe is a rewarding experience. It turns your kitchen into a professional ice cream shop with very little work. The flavor is pure sweet and exactly how real vanilla should taste.
I hope you find as much joy in this recipe as my family does. Experiment with different mix-ins and make this recipe truly your own. There is nothing better than a cold bowl of ice cream you made yourself.
Happy spinning and enjoy every creamy spoonful of your homemade creation!

Hi! I’m Livy Lane, the creator of LivyCooks.com. I share easy, delicious recipes anyone can make at home. Let’s cook, taste and enjoy every bite together!