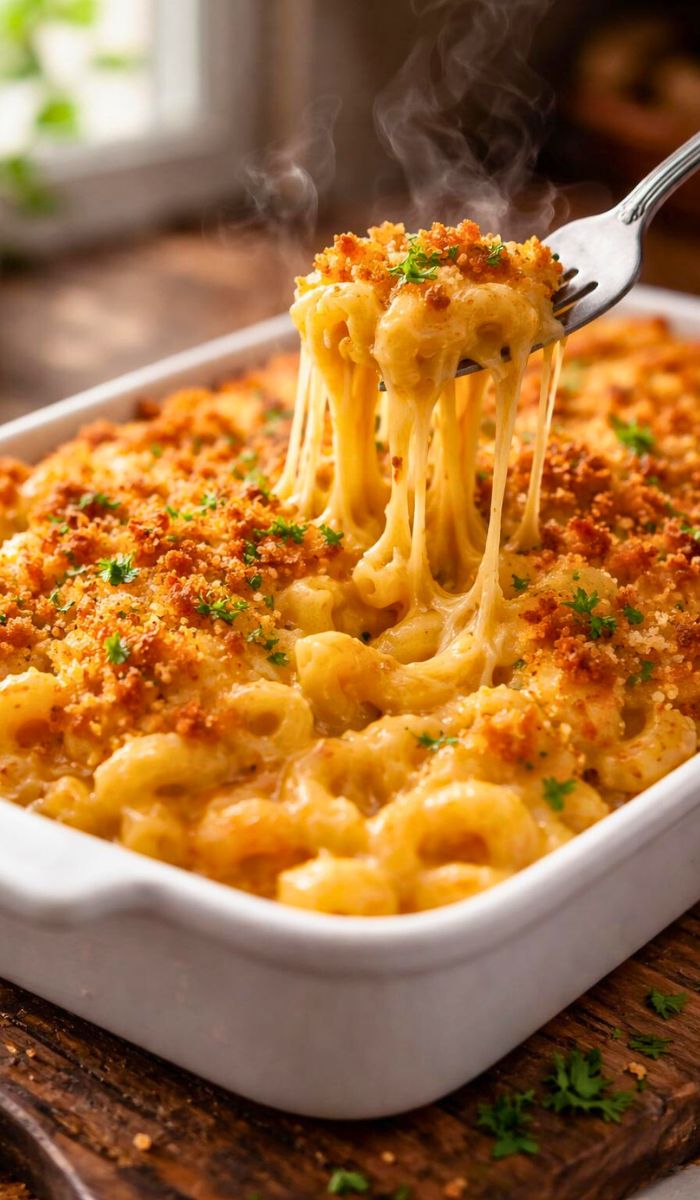
Craving creamy, cheesy comfort? This J Alexanders Mac and Cheese Recipe is pure bliss. Golden topping and gooey cheese pull—restaurant quality at home. Perfect side or main dish.
Learn how to make J Alexanders Mac and Cheese with my tested steps. Simple ingredients and epic results. Your family will beg for seconds!
My Story With This Comforting J Alexanders Mac and Cheese
I first tasted J Alexanders Mac and Cheese on a US trip. That creamy bite haunted me back in Rawalpindi. I experimented for months. Finally nailed it—hubby said it’s better than original.
We ate it by candlelight during loadshedding. Warm cheesy hugs through dark nights.
Now it’s our rainy day savior. Kids sneak bites from fridge. Once made double batch for neighbors. They brought dessert next day. Food like this builds community. My kitchen secret now yours—let’s get cheesy!
Equipment List
- Large pot (for pasta)
- 9×13 baking dish
- Whisk
- Colander
- Measuring cups/spoons
- Cheese grater
- Aluminum foil
Recipe Overview
- Recipe Name: J Alexanders Mac and Cheese Recipe
- Servings: 8
- Prep Time: 20 mins
- Cook Time: 30 mins
- Total Time: 50 mins
- Course: Side Dish
- Cuisine: American
- Calories: 480 kcal per serving
Ingredients for J Alexanders Mac and Cheese Recipe
- 450g elbow macaroni (or cavatappi)
- 4 tbsp butter
- 4 tbsp all-purpose flour
- 1 liter whole milk (warmed)
- 400g sharp cheddar cheese, shredded
- 200g Monterey Jack cheese, shredded
- 1 tsp mustard powder
- 1/2 tsp garlic powder
- 1/2 tsp onion powder
- Salt and white pepper to taste
- Topping:
- 1 cup breadcrumbs
- 4 tbsp melted butter
- 1/4 cup grated Parmesan
These make perfect J Alexanders Mac and Cheese. Fresh grated cheese melts best.
Instructions for J Alexanders Mac and Cheese Recipe
1. Cook the Pasta
Boil large pot salted water. Add macaroni. Cook al dente—2 mins less than package. Drain well. Rinse cold water. Stop cooking. Toss light oil if sticky. Takes 10 minutes total. Perfect texture key.
2. Make Cheese Sauce Base
Melt 4 tbsp butter in saucepan medium heat. Whisk flour. Cook 2 mins—no raw taste. Slowly pour warm milk whisking constantly. Smooth thickens 5-7 mins. Béchamel base ready now. Creamy foundation made.
3. Add Cheeses and Seasoning
Remove from heat. Stir shredded cheddar and Jack. Melts smooth. Add mustard powder, garlic powder, onion powder. Salt, white pepper taste. Creamy golden sauce perfect. Takes 3 minutes. Flavor magic happens.
4. Combine Pasta and Sauce
Large bowl. Mix cooked pasta with cheese sauce. Coat every piece. Pour into greased 9×13 dish. Spread even. Ready for baking. This takes 2 minutes. Luscious mixture complete.
5. Make Crunchy Topping
Mix breadcrumbs, melted butter, Parmesan. Sprinkle over pasta evenly. Golden crust awaits. Bake 180°C (350°F) 25-30 mins. Bubble edges, brown top. Golden deliciousness achieved.
Cooking Tips and Simple Recipe Variations
- Grate cheese yourself—pre-shredded has starch, doesn’t melt.
- Warm milk prevents lumps in sauce.
- Use cavatappi pasta—holds sauce better.
- Add cooked bacon bits for smoky version.
- Swap half cheddar for gouda—extra creamy.
- Make spicy: Dash cayenne in sauce.
- Double cheese on top for ultimate crust.
- Let rest 10 mins after baking—sets perfectly.
These tips guarantee your how to make J Alexanders Mac and Cheese.
Little History Behind This Comfort Food
Mac and cheese born in 1700s America. Jefferson loved it—called it macaroni pie. Evolved from Italian pasta dishes. Southern US made creamy versions famous. J Alexanders perfected restaurant style.
In Pakistan, we love cheesy bakes too. Similar to white sauce casseroles. My recipe bridges both worlds. Ultimate comfort crosses oceans.
What to Serve With This Dish
Perfect BBQ side—ribs, burgers. Roast chicken partner. Steakhouse steak loves it. Green beans balance richness. Coleslaw adds crunch. Grilled veggies contrast creamy. Simple tossed salad works great.
Occasion or Event Ideas
Family reunions—crowd favorite. Game day parties disappear fast. Thanksgiving must-have. Potlucks steal show. Birthday dinners comfort. Rainy movie nights perfect. Church suppers shine.
Storage and Reheating Tips
- Fridge airtight container 4 days.
- Freeze baked or unbaked up to 2 months.
- Reheat oven 160°C covered foil 25 mins.
- Microwave single portions stir halfway.
- Add milk splash if dry when reheating.
- Never microwave whole dish—uneven.
Nutrition Information
| Nutrient | Amount per Serving | % Daily Value* |
|---|---|---|
| Calories | 480 kcal | 24% |
| Total Fat | 28g | 36% |
| Saturated Fat | 16g | 80% |
| Sodium | 620mg | 27% |
| Total Carbs | 38g | 14% |
| Sugars | 6g | – |
| Protein | 22g | 44% |
| Calcium | 500mg | 38% |
| Vitamin A | 200mcg | 22% |
*Percent values based on 2000-calorie diet. Comfort with calcium boost.
Is This Dish Good for You?
J Alexanders Mac and Cheese Recipe comforts with balance. Cheese provides calcium for bones. Pasta gives energy carbs. Protein from dairy satisfies hunger. Use whole wheat pasta for fiber.
Lighten with low-fat milk, less cheese. Portion control makes it treat, not guilty. Kids grow strong. Adults indulge happily. My family secret weapon.

J Alexanders Mac and Cheese Recipe
Ingredients
- 450 g elbow macaroni or cavatappi
- 4 tbsp butter
- 4 tbsp all-purpose flour
- 1 liter whole milk warmed
- 400 g sharp cheddar cheese shredded
- 200 g Monterey Jack cheese shredded
- 1 tsp mustard powder
- 1/2 tsp garlic powder
- 1/2 tsp onion powder
- Salt and white pepper to taste
- Topping:
- 1 cup breadcrumbs
- 4 tbsp melted butter
- 1/4 cup grated Parmesan
Instructions
Cook the Pasta
- Boil large pot salted water. Add macaroni. Cook al dente—2 mins less than package. Drain well. Rinse cold water. Stop cooking. Toss light oil if sticky. Takes 10 minutes total. Perfect texture key.
Make Cheese Sauce Base
- Melt 4 tbsp butter in saucepan medium heat. Whisk flour. Cook 2 mins—no raw taste. Slowly pour warm milk whisking constantly. Smooth thickens 5-7 mins. Béchamel base ready now. Creamy foundation made.
Add Cheeses and Seasoning
- Remove from heat. Stir shredded cheddar and Jack. Melts smooth. Add mustard powder, garlic powder, onion powder. Salt, white pepper taste. Creamy golden sauce perfect. Takes 3 minutes. Flavor magic happens.
Combine Pasta and Sauce
- Large bowl. Mix cooked pasta with cheese sauce. Coat every piece. Pour into greased 9×13 dish. Spread even. Ready for baking. This takes 2 minutes. Luscious mixture complete.
Make Crunchy Topping
- Mix breadcrumbs, melted butter, Parmesan. Sprinkle over pasta evenly. Golden crust awaits. Bake 180°C (350°F) 25-30 mins. Bubble edges, brown top. Golden deliciousness achieved.
Notes
- Grate cheese yourself—pre-shredded has starch, doesn’t melt.
- Warm milk prevents lumps in sauce.
- Use cavatappi pasta—holds sauce better.
- Add cooked bacon bits for smoky version.
- Swap half cheddar for gouda—extra creamy.
- Make spicy: Dash cayenne in sauce.
- Double cheese on top for ultimate crust.
- Let rest 10 mins after baking—sets perfectly.
FAQs about J Alexanders Mac and Cheese Recipe
Why grate cheese instead of pre-shredded?
Pre-shredded has anti-caking agents. Won’t melt smooth. Fresh grated gives creamy sauce. Worth 5 minutes extra. Restaurant secret revealed.
Can I make gluten-free J Alexanders Mac and Cheese?
Yes! Use gluten-free pasta, flour blend. Same steps. Tastes identical. Brands like Barilla work perfect. Feeds everyone.
How do I prevent watery sauce?
Cook pasta al dente. Don’t overbake. Fresh grated cheese. Room temp milk. Sauce stays thick luscious. Pro technique.
Can I assemble ahead for parties?
Yes! Make through step 4. Cover refrigerate overnight. Add topping bake day-of. Even better flavor. Crowd-pleaser guaranteed.
What makes restaurant mac better than boxed?
Real cheese melts superior. Béchamel sauce creamy. Crunchy topping contrast. Fresh seasoning elevates. Worth every minute.
Final Thoughts
Your J Alexanders Mac and Cheese Recipe awaits glory. Gooey, golden, full heart. From my loadshedding kitchen wins to your table triumph, it delivers joy. Bake tonight. Watch cheesy smiles spread.
What’s your mac twist? Comment below—I read every one. Here’s to comfort food that hugs souls. Cheesy adventures continue!

Hi! I’m Livy Lane, the creator of LivyCooks.com. I share easy, delicious recipes anyone can make at home. Let’s cook, taste and enjoy every bite together!